



Quarter-by-Quarter
| Team | Q1 | Q2 | Q3 | Q4 | Final |
|---|---|---|---|---|---|
| Carlton | 6.5 41 | 8.8 56 | 11.13 79 | 15.16 106 | 106 |
| Melbourne | 0.6 6 | 3.10 28 | 5.18 48 | 10.19 79 | 79 |
Match Report
Umpires: I.Clayton & P.Carey
Goalkickers: S.Kernahan 4, J.Dorotich 4, M.Naley 2, C.Bradley 2, R.Dennis 1, A.Gleeson 1, S.Verbeek 1.
Best: S.Kernahan, P.Dean, S.Da Rui, J.Dorotich, J.Madden, G.Hawker.
Reports: Nil.
Injuries: Nil.
Game Review
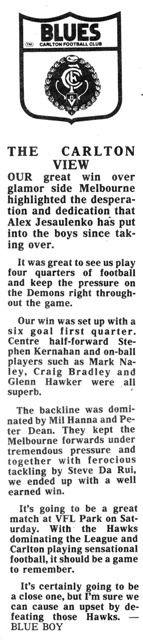
Stephen Kernahan produced another wonderful display up forward, with 17 kicks, 10 marks and four goals, as the Blues beat top five-placed Melbourne in one of the club's best displays of the season. Kernahan got solid support in attack from Jon Dorotich who also booted four goals.
Carlton's rugged, solidly built defender Steve Da Rui started his own wrecking machine against the opposition captains this round. Starting with Melbourne skipper, Greg Healy, Da Rui would crunch and stretcher over the next three weeks the opposing team's captain. Whether it was by accident or design, only Da Rui could tell. But to be hit by him, you stayed hit, all these "hits" were legitimate hip and shoulders.
Team
| B: | 43 Mick Kennedy | 45 Warren McKenzie | 22 Ian Aitken |
| HB: | 35 Peter Dean | 26 David Rhys-Jones | 31 Tom Alvin |
| C: | 13 Mil Hanna | 11 Glenn Hawker | 23 Paul Meldrum |
| HF: | 21 Craig Bradley | 4 Stephen Kernahan (c) | 3 Richard Dennis |
| F: | 6 Jon Dorotich | 15 Simon Verbeek | 12 Adrian Gleeson |
| Ruck: | 44 Justin Madden (vc) | 5 Steve Da Rui | 17 Mark Naley |
| Interchange: | 19 Andrew Phillips | 38 Shane Robertson | |
| Emgs: | 28 David Kernahan | 29 Michael Gallagher | 47 Andrew McKinnon |
| Coach: | Alex Jesaulenko | ||
Player Statistics

Carlton
| # | Player | KI | HB | DI | MK | GL | BH | GA | IF | MI | UP | BO | TK | RB | 1% | FF | FA | CP | CM | CL | CG | HO | BR | %P |
|---|---|---|---|---|---|---|---|---|---|---|---|---|---|---|---|---|---|---|---|---|---|---|---|---|
| 3 |  Richard Dennis | 5 | 3 | 8 | 3 | 1 | - | - | - | - | - | - | 1 | - | - | - | 2 | - | - | - | - | - | - | - |
| 4 |  Stephen Kernahan | 17 | 4 | 21 | 10 | 4 | 4 | - | - | - | - | - | - | - | - | 2 | 3 | - | - | - | - | 2 | 3 | - |
| 5 |  Steven Da Rui | 17 | 4 | 21 | 3 | - | 1 | - | - | - | - | - | 6 | - | - | 2 | - | - | - | - | - | - | - | - |
| 6 |  Jon Dorotich | 10 | 1 | 11 | 9 | 4 | 2 | - | - | - | - | - | 1 | - | - | 1 | 4 | - | - | - | - | 2 | - | - |
| 11 |  Glenn Hawker | 18 | 5 | 23 | 5 | - | 2 | - | - | - | - | - | 1 | - | - | - | 3 | - | - | - | - | - | - | - |
| 12 |  Adrian Gleeson | 10 | 7 | 17 | 2 | 1 | - | - | - | - | - | - | 4 | - | - | 1 | - | - | - | - | - | - | - | - |
| 13 |  Mil Hanna | 16 | 4 | 20 | 5 | - | 3 | - | - | - | - | - | 3 | - | - | - | 1 | - | - | - | - | - | 2 | - |
| 15 |  Simon Verbeek | 5 | 3 | 8 | 4 | 1 | - | - | - | - | - | - | 4 | - | - | 1 | - | - | - | - | - | - | - | - |
| 17 |  Mark Naley | 12 | 7 | 19 | 2 | 2 | - | - | - | - | - | - | 4 | - | - | 2 | 2 | - | - | - | - | - | - | - |
| 19 |  Andrew Phillips | 2 | 2 | 4 | - | - | - | - | - | - | - | - | 1 | - | - | - | 1 | - | - | - | - | - | - | - |
| 21 |  Craig Bradley | 14 | 6 | 20 | 2 | 2 | 1 | - | - | - | - | - | 1 | - | - | 4 | - | - | - | - | - | - | - | - |
| 22 |  Ian Aitken | 9 | - | 9 | 2 | - | - | - | - | - | - | - | 2 | - | - | 2 | 1 | - | - | - | - | - | - | - |
| 23 |  Paul Meldrum | 13 | 11 | 24 | 2 | - | - | - | - | - | - | - | 2 | - | - | - | - | - | - | - | - | 1 | - | - |
| 26 |  David Rhys-Jones | 5 | 8 | 13 | 2 | - | - | - | - | - | - | - | 2 | - | - | 2 | - | - | - | - | - | - | - | - |
| 31 |  Tom Alvin | 15 | 4 | 19 | 5 | - | - | - | - | - | - | - | 3 | - | - | 1 | - | - | - | - | - | - | - | - |
| 35 |  Peter Dean | 9 | 4 | 13 | 5 | - | 3 | - | - | - | - | - | 3 | - | - | - | 1 | - | - | - | - | - | 1 | - |
| 43 |  Michael Kennedy | 8 | - | 8 | 2 | - | - | - | - | - | - | - | 1 | - | - | 2 | 2 | - | - | - | - | - | - | - |
| 44 |  Justin Madden | 11 | - | 11 | 5 | - | - | - | - | - | - | - | 2 | - | - | 2 | 1 | - | - | - | - | 16 | - | - |
| 45 |  Warren McKenzie | 11 | 4 | 15 | 2 | - | - | - | - | - | - | - | - | - | - | 2 | - | - | - | - | - | - | - | - |
| Team Total | 207 | 77 | 284 | 70 | 15 | 16 | - | - | - | - | - | 41 | - | - | 24 | 21 | - | - | - | - | 21 | 6 | - | |
| Team Average | 10.9 | 4.1 | 14.9 | 3.7 | 0.8 | 0.8 | - | - | - | - | - | 2.2 | - | - | 1.3 | 1.1 | - | - | - | - | 1.1 | 0.3 | - | |
Photos from Carlton vs Melbourne
Last updated by Club Archive ·