



Quarter-by-Quarter
| Team | Q1 | Q2 | Q3 | Q4 | Final |
|---|---|---|---|---|---|
| North Melbourne | 0.0 0 | 3.6 24 | 6.8 44 | 10.15 75 | 75 |
| Carlton | 5.9 39 | 8.10 58 | 14.13 97 | 18.16 124 | 124 |
Match Report
Umpires: I.Robinson & K.Smith
Goalkickers: R.Walls 5, P.Jones 4, M.Fitzpatrick 2, B.Armstrong 2, R.Ashman 2, T.Keogh 1, T.Pickett 1, D.McKay 1
Best: M.Fitzpatrick, P.Jones, R.Byrne, B.Doull, R.Walls, M.Maclure
Game Review
Ray Byrne may have played his best game ever for the Blues on the great Keith Greig. He beat him pointless!!
The Blues scored their first win at Arden Street since 1973 and kicked one behind more than the score that year, when they humbled the usually strong Northeners with their greater skill and incentive to win. By doing so and the unpredicted loss by Hawthorn to Richmond, Carlton swept to the League leadership once more after losing it in Round eight. It was their highest score at Arden Street since 1972, the highest against North by any team since Round two this year, and only the third century for 1976 - a tribute to the Kangaroos defence. - Football Record.
Team
| B: | 19 John O'Connell | 20 Geoff Southby | 18 Kevin Heath |
| HB: | 15 Phil Pinnell | 36 Mark Maclure | 11 Bruce Doull |
| C: | 30 Tony Pickett | 10 Alan Mangels | 26 Ray Byrne |
| HF: | 43 David McKay | 42 Robert Walls (vc) | 24 Russell Ohlsen |
| F: | 3 Mike Fitzpatrick | 25 Alex Jesaulenko (c) | 14 Rod Ashman |
| Ruck: | 28 Peter Jones (dvc) | 12 Barry Armstrong | 8 Trevor Keogh |
| Res: | 32 Leigh McConnon | 5 Syd Jackson | |
| Coach: | Ian Thorogood | ||
Player Statistics

Carlton
| # | Player | KI | HB | DI | MK | GL | BH | GA | IF | MI | UP | BO | TK | RB | 1% | FF | FA | CP | CM | CL | CG | HO | BR | %P |
|---|---|---|---|---|---|---|---|---|---|---|---|---|---|---|---|---|---|---|---|---|---|---|---|---|
| 3 |  Mike Fitzpatrick | 13 | 4 | 17 | 7 | 2 | 3 | - | - | - | - | - | - | - | - | 3 | 10 | - | - | - | - | - | - | - |
| 5 |  Syd Jackson | 3 | - | 3 | - | - | - | - | - | - | - | - | - | - | - | - | 2 | - | - | - | - | - | - | - |
| 8 |  Trevor Keogh | 13 | 1 | 14 | 2 | 1 | 1 | - | - | - | - | - | - | - | - | 2 | 4 | - | - | - | - | - | - | - |
| 10 |  Alan Mangels | 15 | 3 | 18 | 1 | - | - | - | - | - | - | - | - | - | - | 2 | 1 | - | - | - | - | - | - | - |
| 11 |  Bruce Doull | 9 | 5 | 14 | 1 | - | 1 | - | - | - | - | - | - | - | - | 2 | - | - | - | - | - | - | - | - |
| 12 |  Barry Armstrong | 22 | 5 | 27 | 9 | 2 | - | - | - | - | - | - | - | - | - | 2 | - | - | - | - | - | - | - | - |
| 14 |  Rodney Ashman | 13 | - | 13 | 3 | 2 | 4 | - | - | - | - | - | - | - | - | 2 | 2 | - | - | - | - | - | - | - |
| 15 |  Phillip Pinnell | 12 | 5 | 17 | 5 | - | - | - | - | - | - | - | - | - | - | 1 | 3 | - | - | - | - | - | - | - |
| 18 |  Kevin Heath | 8 | 4 | 12 | 6 | - | - | - | - | - | - | - | - | - | - | 1 | - | - | - | - | - | - | - | - |
| 19 |  John OConnell | 9 | 4 | 13 | 5 | - | - | - | - | - | - | - | - | - | - | 1 | 2 | - | - | - | - | - | - | - |
| 20 |  Geoff Southby | 5 | 2 | 7 | 1 | - | - | - | - | - | - | - | - | - | - | - | - | - | - | - | - | - | - | - |
| 24 |  Russell Ohlsen | 16 | 3 | 19 | 1 | - | - | - | - | - | - | - | - | - | - | 3 | 3 | - | - | - | - | - | - | - |
| 25 |  Alex Jesaulenko | 8 | 4 | 12 | 3 | - | - | - | - | - | - | - | - | - | - | - | 2 | - | - | - | - | - | - | - |
| 26 |  Ray Byrne | 10 | 10 | 20 | 7 | - | - | - | - | - | - | - | - | - | - | 1 | - | - | - | - | - | - | - | - |
| 28 |  Peter Jones | 7 | 7 | 14 | 5 | 4 | - | - | - | - | - | - | - | - | - | - | 3 | - | - | - | - | - | - | - |
| 30 |  Tony Pickett | 3 | 3 | 6 | 2 | 1 | 1 | - | - | - | - | - | - | - | - | 1 | - | - | - | - | - | - | - | - |
| 32 |  Leigh McConnon | 4 | 2 | 6 | 1 | - | - | - | - | - | - | - | - | - | - | 1 | 1 | - | - | - | - | - | - | - |
| 36 |  Mark Maclure | 15 | 4 | 19 | 8 | - | - | - | - | - | - | - | - | - | - | - | 2 | - | - | - | - | - | - | - |
| 42 |  Robert Walls | 16 | 4 | 20 | 6 | 5 | 3 | - | - | - | - | - | - | - | - | 3 | 3 | - | - | - | - | - | - | - |
| 43 |  David McKay | 9 | 6 | 15 | 5 | 1 | 3 | - | - | - | - | - | - | - | - | 1 | 2 | - | - | - | - | - | - | - |
| Team Total | 210 | 76 | 286 | 78 | 18 | 16 | - | - | - | - | - | - | - | - | 26 | 40 | - | - | - | - | - | - | - | |
| Team Average | 10.5 | 3.8 | 14.3 | 3.9 | 0.9 | 0.8 | - | - | - | - | - | - | - | - | 1.3 | 2.0 | - | - | - | - | - | - | - | |
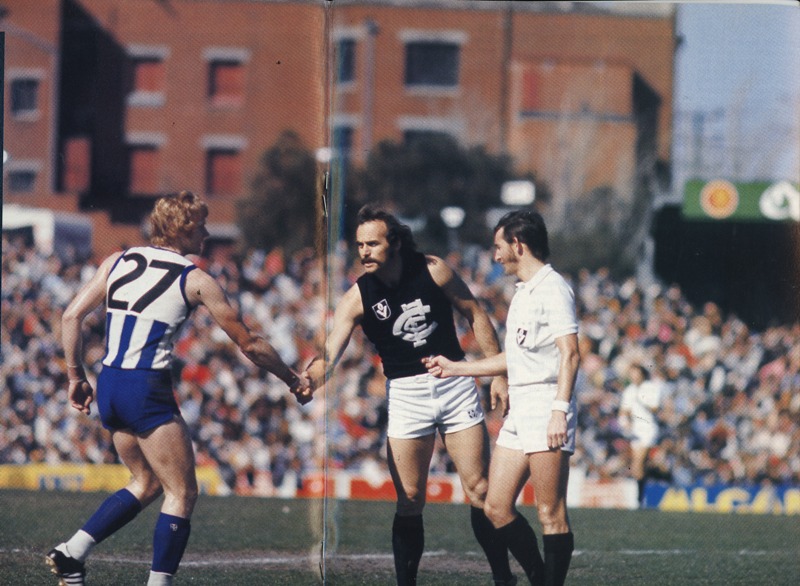
Photos from North Melbourne vs Carlton
Last updated by Club Archive ·