



Quarter-by-Quarter
| Team | Q1 | Q2 | Q3 | Q4 | Final |
|---|---|---|---|---|---|
| Carlton | 8.3 51 | 10.8 68 | 15.10 100 | 19.17 131 | 131 |
| South Melbourne | 4.3 27 | 7.6 48 | 12.11 83 | 15.13 103 | 103 |
Match Report
Umpire: David Levens
Goalkickers: M.Fitzpatrick 3, D.McKay 3, G.Kennedy 3, A.Mangels 2, R.Walls 2, P.Jones 2, C.Davis 1, B.Armstrong 1, T.Keogh 1, G.Whitnall 1.
Best: B.Doull, T.Keogh, G.Southby, A.Jesaulenko, B.Armstrong, A.Mangels
Reports: Nil
Injuries: V.Waite (bruised knee), M.Fitzpatrick (bruised nose)
Game Review
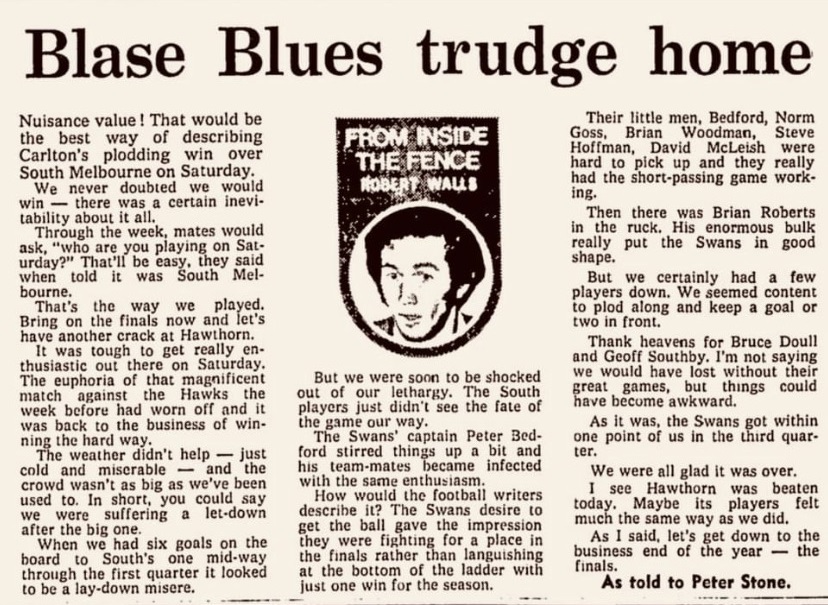
South Melbourne showed their best form for the season when they got to within one point of Carlton twice in the third term and finished up kicking their best score against the Blues since 1970 - 12 matches. It was their 14th century against Carlton in 78 years and the first time the Blues had had two succesive centuries kicked against them (by Haw. previous week) since last year, when the same two sides did it. - Football Record.
Team
| B: | 19 John O'Connell | 20 Geoff Southby | 30 Vin Waite |
| HB: | 25 Alex Jesaulenko (c) | 11 Bruce Doull | 36 Mark Maclure |
| C: | 6 Garry Crane | 24 Russell Ohlsen | 10 Alan Mangels |
| HF: | 4 Vin Catoggio | 42 Robert Walls (vc) | 43 David McKay |
| F: | 28 Peter Jones (dvc) | 16 Greg Kennedy | 8 Trevor Keogh |
| Ruck: | 3 Mike Fitzpatrick | 7 Graeme Whitnall | 12 Barry Armstrong |
| Res: | 23 Craig Davis | 13 Eric Pascoe | |
| Coach: | John Nicholls | ||
Player Statistics

Carlton
| # | Player | KI | HB | DI | MK | GL | BH | GA | IF | MI | UP | BO | TK | RB | 1% | FF | FA | CP | CM | CL | CG | HO | BR | %P |
|---|---|---|---|---|---|---|---|---|---|---|---|---|---|---|---|---|---|---|---|---|---|---|---|---|
| 3 |  Mike Fitzpatrick | 8 | - | 8 | 3 | 3 | - | - | - | - | - | - | - | - | - | 2 | 1 | - | - | - | - | 12 | - | - |
| 4 |  Vin Catoggio | 12 | 3 | 15 | 1 | - | 1 | - | - | - | - | - | - | - | - | 1 | - | - | - | - | - | - | - | - |
| 6 |  Gary Crane | 16 | 5 | 21 | 4 | - | - | - | - | - | - | - | - | - | - | 5 | - | - | - | - | - | - | - | - |
| 7 |  Graeme Whitnall | 11 | 1 | 12 | 1 | 1 | 1 | - | - | - | - | - | - | - | - | 1 | 1 | - | - | - | - | - | - | - |
| 8 |  Trevor Keogh | 15 | 3 | 18 | 3 | 1 | 1 | - | - | - | - | - | - | - | - | 1 | 3 | - | - | - | - | - | - | - |
| 10 |  Alan Mangels | 14 | 4 | 18 | 4 | 2 | 3 | - | - | - | - | - | - | - | - | 2 | 5 | - | - | - | - | - | - | - |
| 11 |  Bruce Doull | 13 | 3 | 16 | - | - | - | - | - | - | - | - | - | - | - | 4 | 2 | - | - | - | - | - | - | - |
| 12 |  Barry Armstrong | 24 | 2 | 26 | 5 | 1 | 4 | - | - | - | - | - | - | - | - | 2 | 1 | - | - | - | - | - | - | - |
| 16 |  Greg Kennedy | 12 | 3 | 15 | 1 | 3 | 2 | - | - | - | - | - | - | - | - | 4 | 3 | - | - | - | - | - | - | - |
| 19 |  John OConnell | 4 | 2 | 6 | 2 | - | - | - | - | - | - | - | - | - | - | - | 1 | - | - | - | - | - | - | - |
| 20 |  Geoff Southby | 13 | 3 | 16 | 3 | - | - | - | - | - | - | - | - | - | - | 1 | 1 | - | - | - | - | - | - | - |
| 23 |  Craig Davis | 10 | 2 | 12 | 6 | 1 | 1 | - | - | - | - | - | - | - | - | - | 1 | - | - | - | - | - | - | - |
| 24 |  Russell Ohlsen | 9 | 3 | 12 | 2 | - | - | - | - | - | - | - | - | - | - | 1 | 2 | - | - | - | - | - | - | - |
| 25 |  Alex Jesaulenko | 13 | 2 | 15 | 10 | - | - | - | - | - | - | - | - | - | - | - | - | - | - | - | - | - | - | - |
| 28 |  Peter Jones | 4 | 5 | 9 | 3 | 2 | - | - | - | - | - | - | - | - | - | 3 | 3 | - | - | - | - | 16 | - | - |
| 30 |  Vin Waite | 2 | - | 2 | - | - | - | - | - | - | - | - | - | - | - | 2 | - | - | - | - | - | - | - | - |
| 36 |  Mark Maclure | 15 | 5 | 20 | 5 | - | - | - | - | - | - | - | - | - | - | 2 | 5 | - | - | - | - | - | - | - |
| 42 |  Robert Walls | 11 | - | 11 | 5 | 2 | 1 | - | - | - | - | - | - | - | - | 3 | 4 | - | - | - | - | - | - | - |
| 43 |  David McKay | 9 | 2 | 11 | 7 | 3 | 1 | - | - | - | - | - | - | - | - | 1 | 4 | - | - | - | - | 4 | - | - |
| Team Total | 215 | 48 | 263 | 65 | 19 | 15 | - | - | - | - | - | - | - | - | 35 | 37 | - | - | - | - | 32 | - | - | |
| Team Average | 11.3 | 2.5 | 13.8 | 3.4 | 1.0 | 0.8 | - | - | - | - | - | - | - | - | 1.8 | 1.9 | - | - | - | - | 1.7 | - | - | |
Photos from Carlton vs South Melbourne
Last updated by Club Archive ·