



Quarter-by-Quarter
| Team | Q1 | Q2 | Q3 | Q4 | Final |
|---|---|---|---|---|---|
| Adelaide | 2.4 16 | 2.9 21 | 5.16 46 | 8.20 68 | 68 |
| Carlton | 1.3 9 | 4.7 31 | 8.7 55 | 13.8 86 | 86 |
Match Report
Umpires: P.Carey & H.Kennedy
Goalkickers: C.Bradley 5, S.Kernahan 3, B.Heaver 2, A.McKay 1, J.Madden 1, A.Gleeson 1.
Best: C.Bradley, A.McKay, S.Silvagni, G.Williams, J.Madden, A.Christou, M.Hogg.
Reports: Nil
Injuries: Nil
Game Review
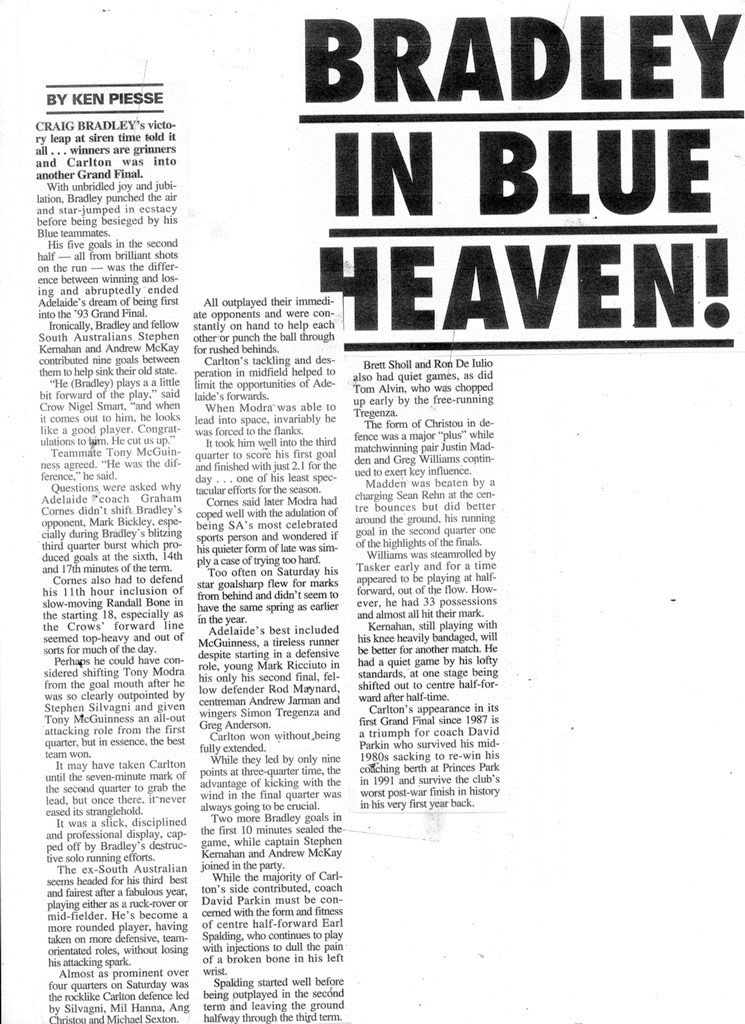
This was a tight, tense game. The Blues would play defensive football to shut down the dangerous Crow forward line, keeping Modra to 2, and always try to bring the ball to ground. 10 rushed behinds for the Crows underlines our defence’s ability to get it through the sticks from hard effort – 8.20 is a little misleading.
Adelaide would play smart with ruckman David Pittman taking Stephen Kernahan and limit his influence to 3 goals. With the Captain held, our goals had to come from other avenues, and up stood Craig Bradley with 5 for the day, 3 of them all on the run in the third quarter which effectively kept Carlton in the game. The Crows would kept coming, but Carlton tightened up, toughed it out and won through to the 1993 Grand Final. But everyone’s favourite memory would be "Harry’s run." Gangling ruckman Justin "Harry" Madden took a handball and galloped toward goal with a bounce, and a baulk around his own shadow before roosting a goal from 50 to bring the house down with an effort (that it was later said) was greater than his attempts at being Victorian Sports Minister!
Team
| B: | 7 Brett Ratten | 1 Stephen Silvagni | 39 Ang Christou |
| HB: | 5 Andrew McKay | 14 Michael Sexton | 13 Mil Hanna |
| C: | 33 Matthew Hogg | 2 Greg Williams | 9 Brett Sholl |
| HF: | 31 Tom Alvin | 11 Earl Spalding | 34 Ron De Iulio |
| F: | 20 Fraser Brown | 4 Stephen Kernahan (c) | 17 Brent Heaver |
| Ruck: | 44 Justin Madden | 21 Craig Bradley (vc) | 12 Adrian Gleeson |
| Interchange: | 25 Mark Athorn | 38 Rohan Welsh | |
| Coach: | David Parkin | ||
Milestones
Interesting Fact: This game was the last time for almost 16 years that a Carlton player in Number #38 would play in a win at senior level. Thereafter, a run of bad luck (and other factors) impacted on wearers of this guernsey - until a skinny kid from WA named Jeff Garlett arrived at Princes Park in 2009.
Player Statistics

Carlton
| # | Player | KI | HB | DI | MK | GL | BH | GA | IF | MI | UP | BO | TK | RB | 1% | FF | FA | CP | CM | CL | CG | HO | BR | %P |
|---|---|---|---|---|---|---|---|---|---|---|---|---|---|---|---|---|---|---|---|---|---|---|---|---|
| 1 |  Stephen Silvagni | 12 | 6 | 18 | 8 | - | - | - | - | - | - | - | 2 | - | - | 2 | 2 | - | - | - | - | - | - | - |
| 2 |  Greg Williams | 17 | 16 | 33 | 5 | - | - | - | - | - | - | - | - | - | - | 4 | 3 | - | - | - | - | - | - | - |
| 4 |  Stephen Kernahan | 9 | - | 9 | 6 | 3 | 2 | - | - | - | - | - | - | - | - | 1 | 2 | - | - | - | - | 1 | - | - |
| 5 |  Andrew McKay | 17 | 5 | 22 | 5 | 1 | 1 | - | - | - | - | - | 1 | - | - | 3 | 3 | - | - | - | - | - | - | - |
| 7 |  Brett Ratten | 12 | 9 | 21 | 4 | - | - | - | - | - | - | - | 1 | - | - | - | 2 | - | - | - | - | - | - | - |
| 9 |  Brett Sholl | 4 | 2 | 6 | 2 | - | - | - | - | - | - | - | 1 | - | - | 1 | - | - | - | - | - | - | - | - |
| 11 |  Earl Spalding | 5 | 5 | 10 | 6 | - | 1 | - | - | - | - | - | 1 | - | - | - | - | - | - | - | - | - | - | - |
| 12 |  Adrian Gleeson | 14 | 4 | 18 | 3 | 1 | 1 | - | - | - | - | - | - | - | - | 2 | 1 | - | - | - | - | 1 | - | - |
| 13 |  Mil Hanna | 7 | 9 | 16 | 4 | - | - | - | - | - | - | - | 3 | - | - | 2 | 1 | - | - | - | - | - | - | - |
| 14 |  Michael Sexton | 9 | 10 | 19 | 4 | - | - | - | - | - | - | - | 1 | - | - | 1 | 2 | - | - | - | - | 2 | - | - |
| 17 |  Brent Heaver | 16 | 6 | 22 | 3 | 2 | - | - | - | - | - | - | 3 | - | - | 5 | 1 | - | - | - | - | - | - | - |
| 20 |  Fraser Brown | 14 | 3 | 17 | 4 | - | 2 | - | - | - | - | - | 1 | - | - | - | - | - | - | - | - | - | - | - |
| 21 |  Craig Bradley | 19 | 8 | 27 | 6 | 5 | - | - | - | - | - | - | 1 | - | - | - | 1 | - | - | - | - | - | - | - |
| 25 |  Mark Athorn | 6 | 6 | 12 | 2 | - | - | - | - | - | - | - | 2 | - | - | - | 2 | - | - | - | - | - | - | - |
| 31 |  Tom Alvin | 8 | 1 | 9 | 4 | - | - | - | - | - | - | - | 1 | - | - | 1 | - | - | - | - | - | - | - | - |
| 33 |  Matthew Hogg | 6 | 6 | 12 | 3 | - | - | - | - | - | - | - | 5 | - | - | - | - | - | - | - | - | - | - | - |
| 34 |  Ron De Iulio | 2 | 1 | 3 | 1 | - | - | - | - | - | - | - | - | - | - | - | 2 | - | - | - | - | - | - | - |
| 38 |  Rohan Welsh | 4 | 5 | 9 | 3 | - | 1 | - | - | - | - | - | - | - | - | 1 | - | - | - | - | - | - | - | - |
| 39 |  Ang Christou | 18 | 5 | 23 | 6 | - | - | - | - | - | - | - | 3 | - | - | 4 | - | - | - | - | - | - | - | - |
| 44 |  Justin Madden | 10 | 4 | 14 | 11 | 1 | - | - | - | - | - | - | 1 | - | - | 2 | 3 | - | - | - | - | 17 | - | - |
| Team Total | 209 | 111 | 320 | 90 | 13 | 8 | - | - | - | - | - | 27 | - | - | 29 | 25 | - | - | - | - | 21 | - | - | |
| Team Average | 10.4 | 5.5 | 16.0 | 4.5 | 0.7 | 0.4 | - | - | - | - | - | 1.4 | - | - | 1.4 | 1.2 | - | - | - | - | 1.1 | - | - | |
Photos from Adelaide vs Carlton
Last updated by Club Archive ·