



Quarter-by-Quarter
| Team | Q1 | Q2 | Q3 | Q4 | Final |
|---|---|---|---|---|---|
| Carlton | 7.4 46 | 9.6 60 | 12.8 80 | 12.9 81 | 81 |
| Collingwood | 3.0 18 | 8.5 53 | 8.8 56 | 11.9 75 | 75 |
Match Report
Umpires: G.James & R.Sawers
Goalkickers: P.Meldrum 4, P.McConville 2, W.Johnston 1, M.Maclure, R.Ashman 1, F.Murphy 1, D.Rhys-Jones 1, W.Harmes 1.
Best: P.Meldrum, T.Alvin, W.Johnston, P.Rohde, D.English, S.Silvagni, B.Doull. Reports: S.Morwood (Coll.) striking D.Rhys-Jones. Injuries: R.Ashman (knee) and B.Doull (foot).
Reports: S.Morwood (Coll.) striking D.Rhys-Jones.
Injuries: R.Ashman (knee) and B.Doull (foot).
Game Review
Bruce Doull made his eagerly anticipated return after injury and Warren Ralph was back for just his second game of 1985. Tied up fourth and set up Elimination final berth against the Kangaroos. By the way, what's with that crowd - 37000 to a Carlton/Collingwood game at Waverley!
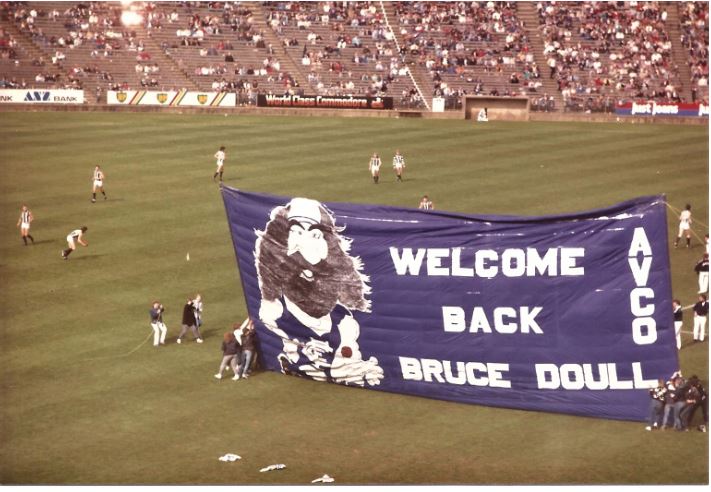
Image; courtsey K. McNair
Video
Team
B: | 27 Des English | 1 Stephen Silvagni | 23 Paul Meldrum |
HB: | 35 Peter Dean | 11 Bruce Doull | 9 Ken Hunter (vc) |
C: | 41 Peter Rohde | 31 Tom Alvin | 26 David Rhys-Jones |
HF: | 7 Wayne Johnston (c) | 29 Ian Muller | 37 Wayne Harmes |
F: | 36 Mark Maclure | 22 Warren Ralph | 30 Fraser Murphy |
Ruck: | 44 Justin Madden | 38 Shane Robertson | 14 Rod Ashman |
Interchange: | 32 David Glascott | 33 Peter McConville | |
Emgs: | 28 Spiro Kourkoumelis | 34 Alex Marcou | 45 Warren McKenzie |
Coach: | David Parkin | ||
Milestones
Last Game (Carlton): Ian Muller
Player Statistics

Carlton
| # | Player | KI | HB | DI | MK | GL | BH | GA | IF | MI | UP | BO | TK | RB | 1% | FF | FA | CP | CM | CL | CG | HO | BR | %P |
|---|---|---|---|---|---|---|---|---|---|---|---|---|---|---|---|---|---|---|---|---|---|---|---|---|
| 1 |  Stephen Silvagni | 10 | 5 | 15 | 3 | - | - | - | - | - | - | - | - | - | - | 5 | - | - | - | - | - | - | - | - |
| 7 |  Wayne Johnston | 20 | 4 | 24 | 2 | 1 | 2 | - | - | - | - | - | - | - | - | 1 | 1 | - | - | - | - | - | - | - |
| 9 |  Ken Hunter | 9 | 3 | 12 | 6 | - | - | - | - | - | - | - | - | - | - | 1 | - | - | - | - | - | 1 | - | - |
| 11 |  Bruce Doull | 9 | 3 | 12 | 3 | - | - | - | - | - | - | - | - | - | - | 2 | 1 | - | - | - | - | - | - | - |
| 14 |  Rodney Ashman | 13 | 5 | 18 | 3 | 1 | 1 | - | - | - | - | - | - | - | - | - | 1 | - | - | - | - | - | - | - |
| 22 |  Warren Ralph | 6 | 1 | 7 | 2 | - | 3 | - | - | - | - | - | - | - | - | 1 | 3 | - | - | - | - | - | - | - |
| 23 |  Paul Meldrum | 18 | 6 | 24 | 4 | 4 | - | - | - | - | - | - | - | - | - | 5 | 1 | - | - | - | - | - | - | - |
| 26 |  David Rhys-Jones | 10 | 6 | 16 | 8 | 1 | - | - | - | - | - | - | - | - | - | 4 | 3 | - | - | - | - | - | - | - |
| 27 |  Des English | 13 | 6 | 19 | 2 | - | - | - | - | - | - | - | - | - | - | 2 | 2 | - | - | - | - | - | - | - |
| 29 |  Ian Muller | 5 | - | 5 | 1 | - | - | - | - | - | - | - | - | - | - | 1 | 1 | - | - | - | - | - | - | - |
| 30 |  Fraser Murphy | 9 | 2 | 11 | 3 | 1 | 1 | - | - | - | - | - | - | - | - | 2 | 1 | - | - | - | - | - | - | - |
| 31 |  Tom Alvin | 15 | 3 | 18 | 2 | - | - | - | - | - | - | - | - | - | - | 2 | - | - | - | - | - | - | - | - |
| 32 |  David Glascott | 7 | 5 | 12 | 2 | - | - | - | - | - | - | - | - | - | - | - | 1 | - | - | - | - | - | - | - |
| 33 |  Peter McConville | 12 | 10 | 22 | 10 | 2 | - | - | - | - | - | - | - | - | - | 3 | 4 | - | - | - | - | - | - | - |
| 35 |  Peter Dean | 5 | 5 | 10 | 3 | - | - | - | - | - | - | - | - | - | - | - | 2 | - | - | - | - | - | - | - |
| 36 |  Mark Maclure | 11 | 3 | 14 | 5 | 1 | 1 | - | - | - | - | - | - | - | - | 1 | 3 | - | - | - | - | - | - | - |
| 37 |  Wayne Harmes | 7 | 5 | 12 | 4 | 1 | - | - | - | - | - | - | - | - | - | 1 | 3 | - | - | - | - | - | - | - |
| 38 |  Shane Robertson | 1 | 1 | 2 | - | - | - | - | - | - | - | - | - | - | - | - | - | - | - | - | - | - | - | - |
| 41 |  Peter Rohde | 18 | 4 | 22 | 6 | - | - | - | - | - | - | - | - | - | - | 1 | 1 | - | - | - | - | - | - | - |
| 44 |  Justin Madden | 12 | 7 | 19 | 4 | - | 1 | - | - | - | - | - | - | - | - | 7 | 2 | - | - | - | - | 12 | - | - |
| Team Total | 210 | 84 | 294 | 73 | 12 | 9 | - | - | - | - | - | - | - | - | 39 | 30 | - | - | - | - | 13 | - | - | |
| Team Average | 10.5 | 4.2 | 14.7 | 3.6 | 0.6 | 0.5 | - | - | - | - | - | - | - | - | 1.9 | 1.5 | - | - | - | - | 0.7 | - | - | |
Photos from Carlton vs Collingwood
Last updated by Jamie Sanderson ·